Based on the profile information, you can contact the desired panel.
This allows you to collect survey responses and coordinate schedules for both remote and face-to-face interviews all at once!
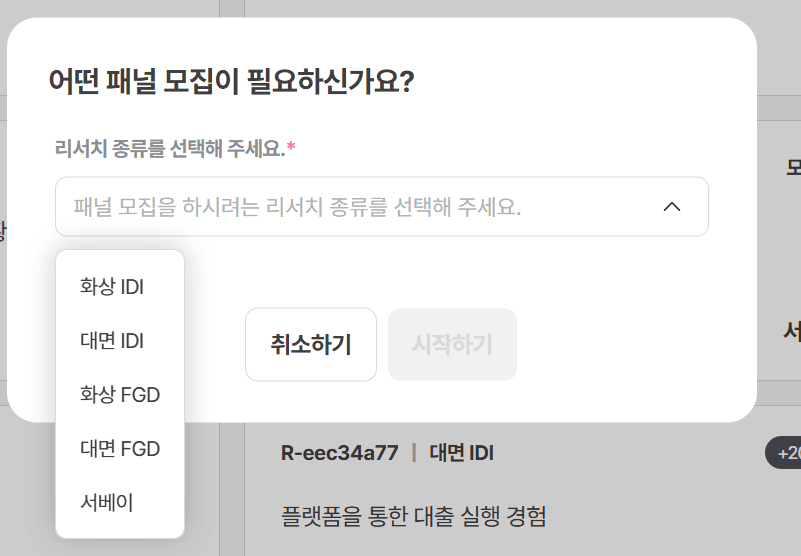
1. Select research type and enter information
Please select the type of research project you wish to conduct and enter the details.
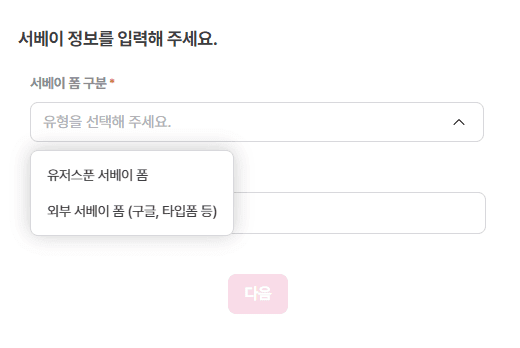
1-1. Survey
Please choose whether to use Userspoon's survey form or an external survey form, and insert the response link!
Please insert the survey link created in Userspoon's survey form as the response link.
💡 Using Userspoon's survey form allows you to collect responses with equal gender distribution.
1-2. Face-to-face/Remote IDI/FGD
Please enter the information for the face-to-face or remote interview (IDI or FGD).
Please enter the required time, compensation amount, and payment date.
Please also enter the interview method and precautions.
→ The information you entered will be confirmed by the panel in the notification talk!
📍 The video link for remote interviews can be entered at the time when the panel's participation in the interview is confirmed!
(Details on entering interview link information and the notification talk screen will be provided later!)
*Face-to-face interview information entry and notification talk screen
*Remote interview information entry and notification talk screen
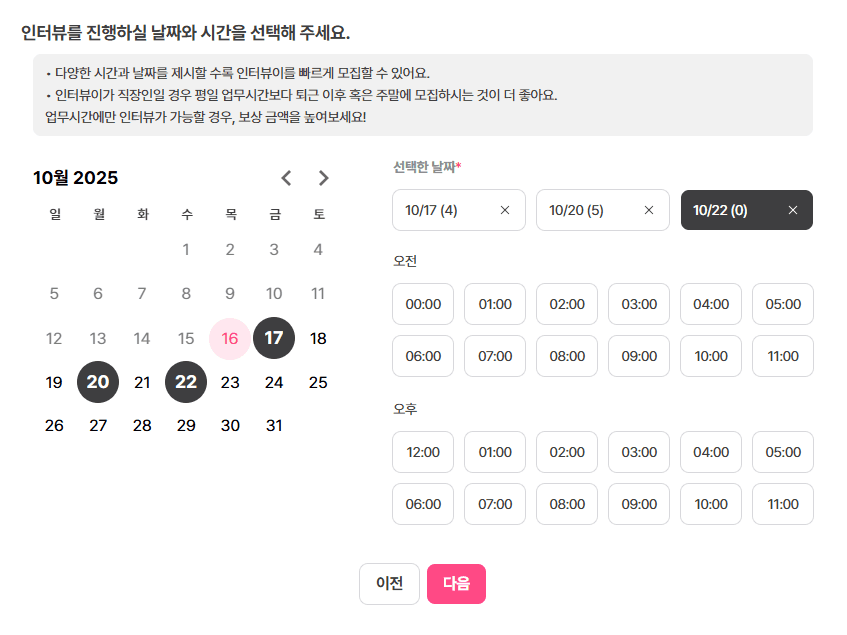
2. Set interview schedule
If it is a face-to-face or remote interview, please select the recruitment schedule.
You can choose time slots for your desired dates.
3. Set recruitment criteria
3-1. Choose group or profile criteria
Please select the recruitment method.
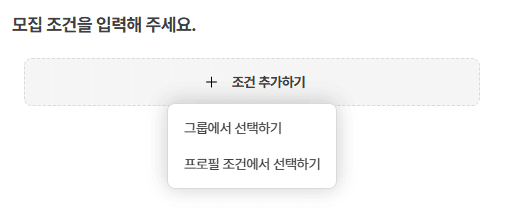
3-1-1. Select from the group
1️⃣ Specify group
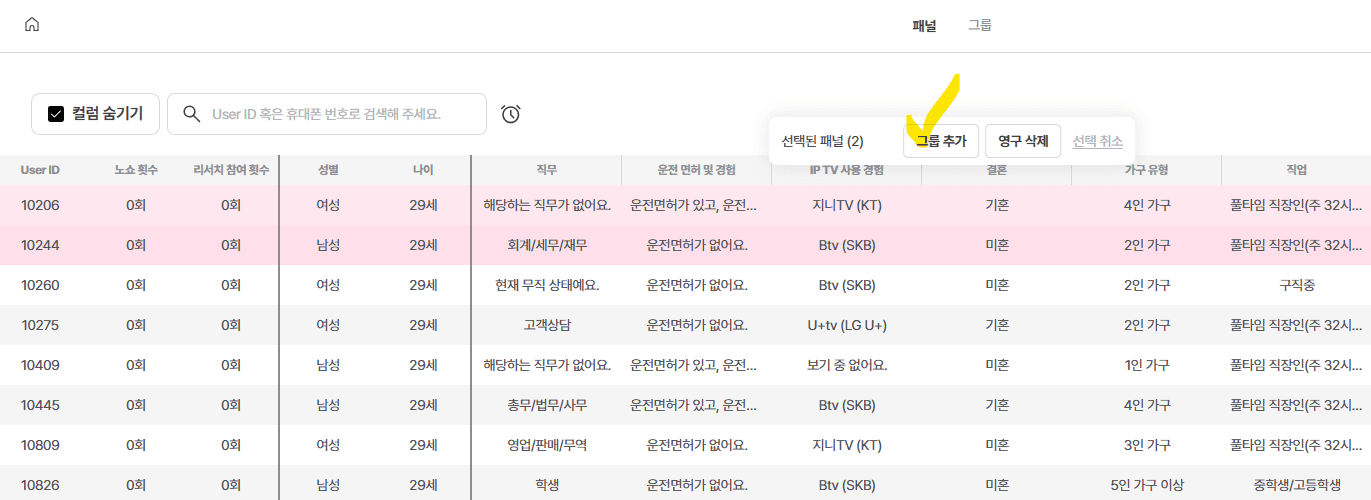
You can create a group based on the User IDs from the panel list.
✅ How to create a group
Method 1) Select directly from the panel list
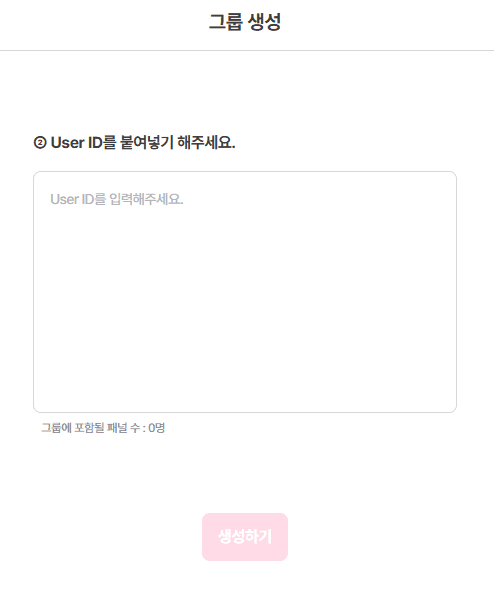
Method 2) Create a group by adding User IDs
Please click on Panel Management > All Panels > Top [Group] > Right [+Create Group].

You can create a group by directly entering User IDs.
✅ The created group can be checked in the top group list!

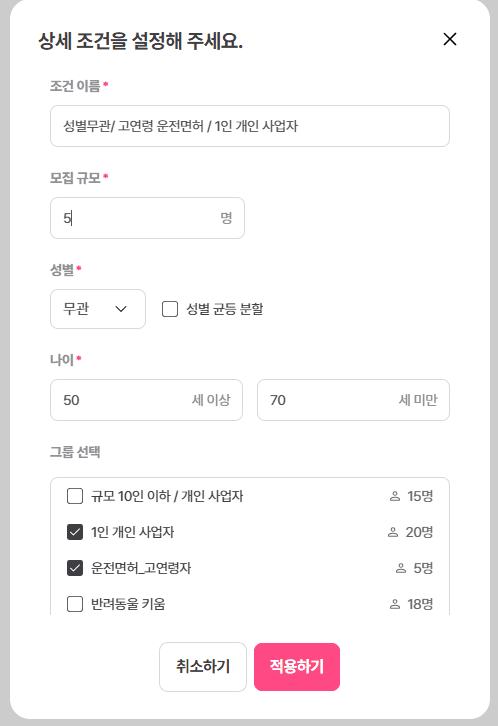
2️⃣ Enter detailed criteria
‘Criteria Name’: Please set an easy-to-understand name that describes the characteristics of the target you are recruiting.
Example: Male / 30s-40s / Borrowers from First Financial Institutions in the last 6 months
‘Recruitment Scale’: Please enter the number of people to recruit for this project.
‘Gender/Age’: This will be sent based on the profile question responses.
Notifications will not be sent to panels without a profile response history.
Select Group
If you select multiple groups, it will be set as an AND condition between the groups.
For example, if you select Driver's License_Older Adults and Sole Proprietor, notifications will only be sent to users belonging to both groups.
If you want to recruit under different conditions, please add recruitment criteria!
3-1-2. Select from profile criteria
You can recruit based on the response results from the panel's profile responses.
For example, you can recruit users who have inputs for both Sports as a hobby and Cars.

4. Send notifications
1️⃣ Enter research description
Please enter a description of the research you are conducting.
2️⃣ Select excluded participants
If the user belongs to a specific group, please exclude them from the ‘Group Selection’.
If the user has participated in another recruitment project, please exclude them from ‘Other Recruitment Projects’.
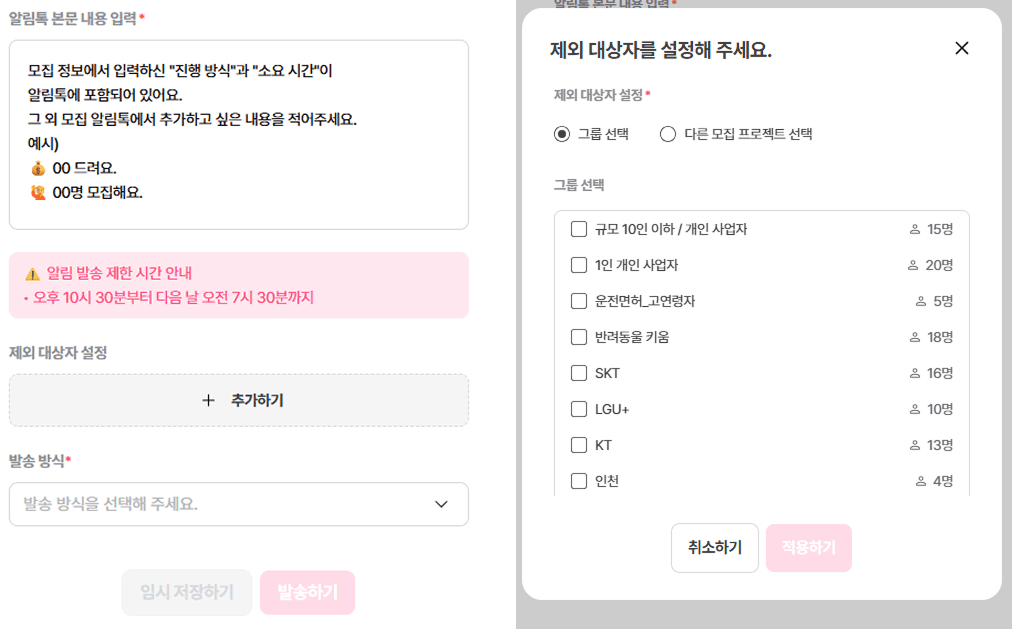
3️⃣ Select sending method
Manual Sending: Sent once for three times the target recruitment number.
Manual + Split Sending: If the three times the target recruitment number exceeds 500, it will be sent in batches of 500 every 10 minutes.
Automatic Sending: After the first sending with 3-5 times the target recruitment number, additional sending will be conducted every 30 minutes according to the shortfall.
Automatic + Duplicate Sending: Notifications will be sent to all subjects and resent to those who did not participate.
4️⃣ Check sending history
The results of the notification sending can be checked in [Sending Completion History].
Drafts are temporarily stored and can be retrieved in [Temporarily Saved Notifications].
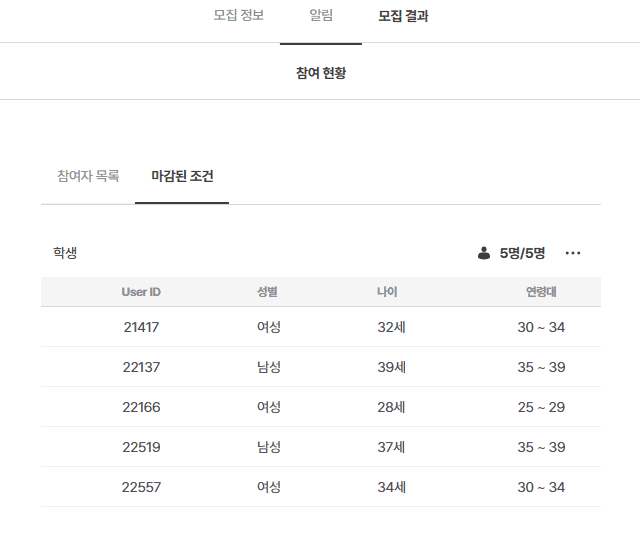
5. Check recruitment results
5-1. Survey
You can check the response status by recruitment criteria.
If you wish to stop recruitment after seeing the recruitment status, please click on [Stop Recruitment].
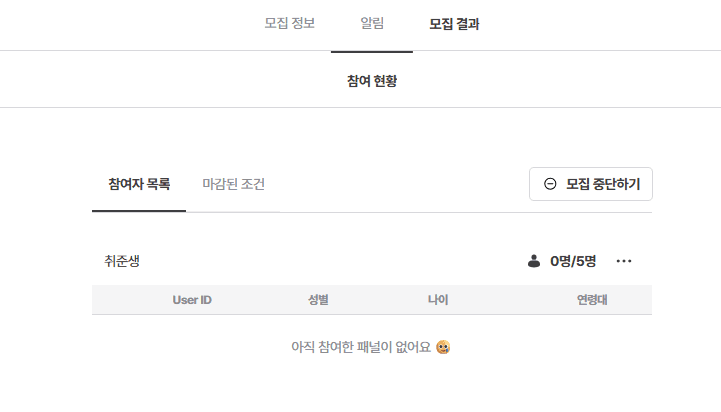
You can check completed recruitment criteria in [Closed Criteria].
5-2. Face-to-face/Remote Interviews
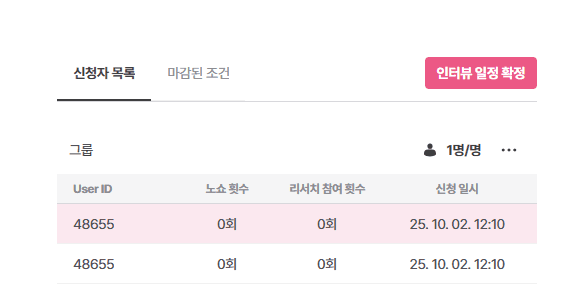
1️⃣ Check application status
You can check the application status of interviews by date and time.
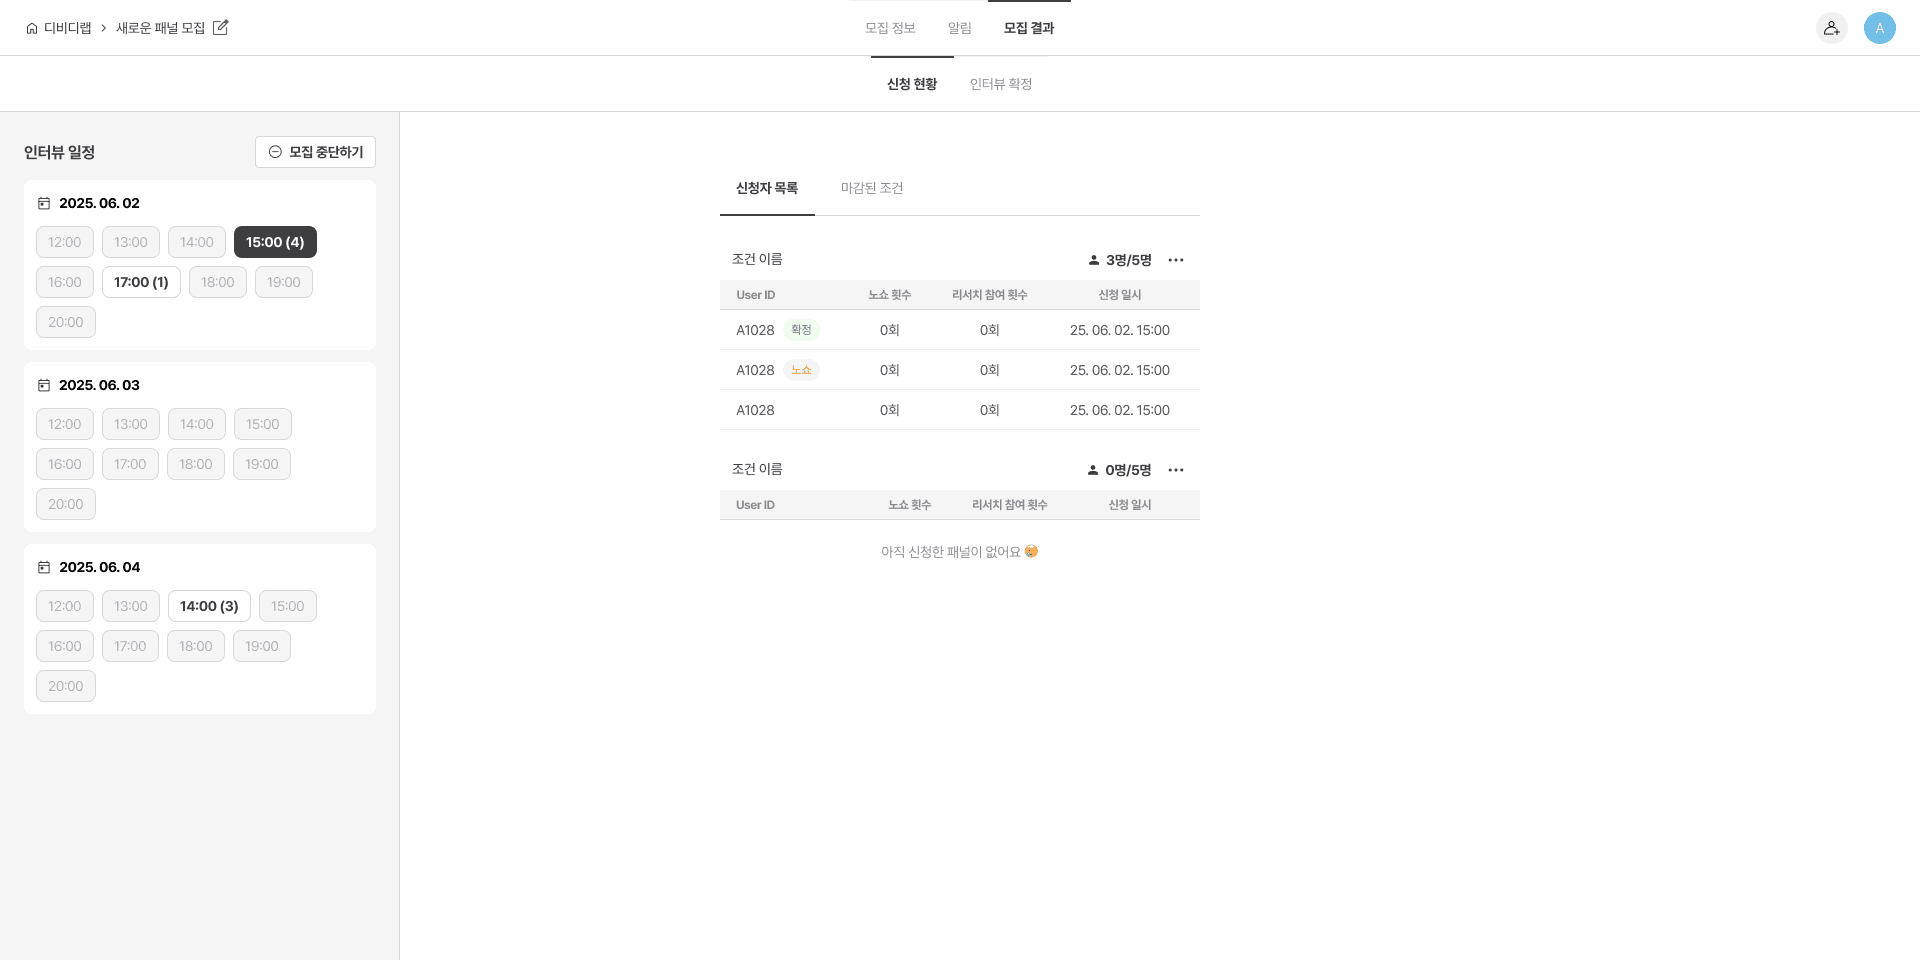
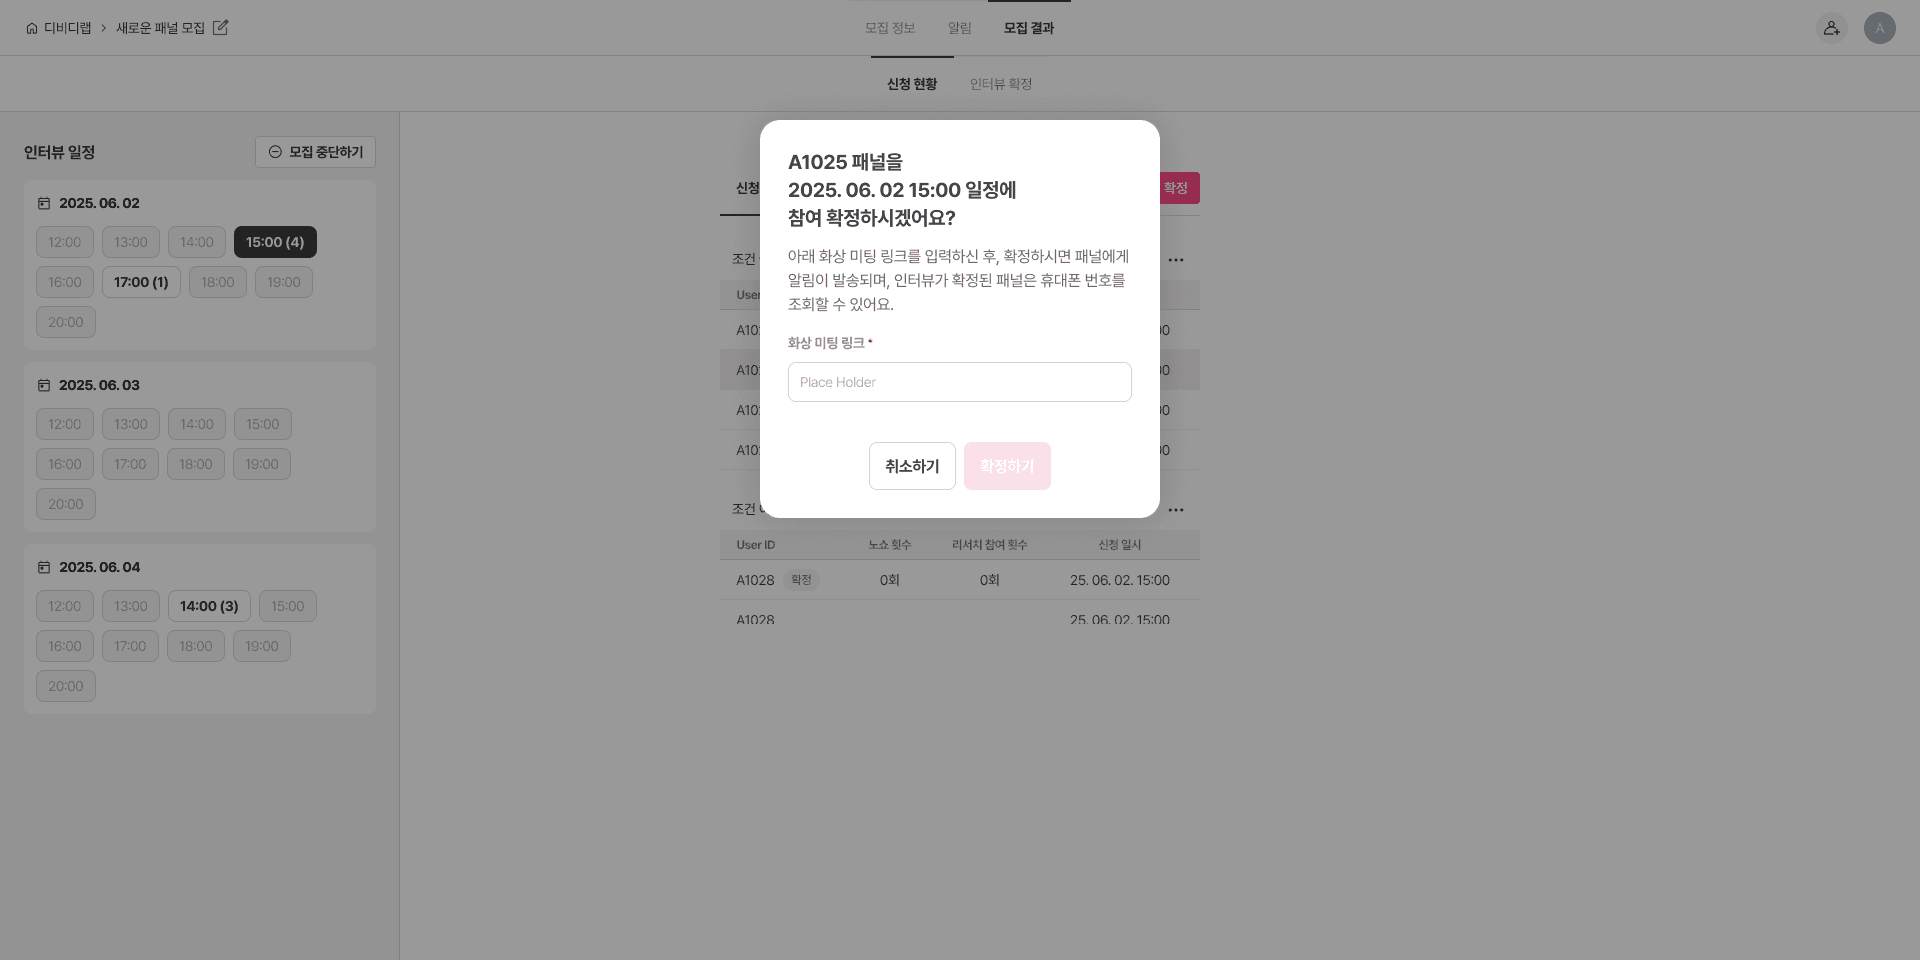
2️⃣ Confirm interview and send instructions
When selecting the interview panel, the [Confirm Panel] button in the upper right will be activated. Please click this button.
Upon confirmation of the interview, a confirmation notification will be sent to the panel.
For remote interviews, you can add a video meeting link.
5-2-1. No-Show/Interview Cancellation
1️⃣ After confirming the interview, you can send a reminder notification via [Resend Notification].
2️⃣ If the panel does not participate at the promised time, you can process them as a no-show.
You can check this in the [No-Show Count] from the panel list.
3️⃣ If you must cancel the interview, please click [Cancel Interview].
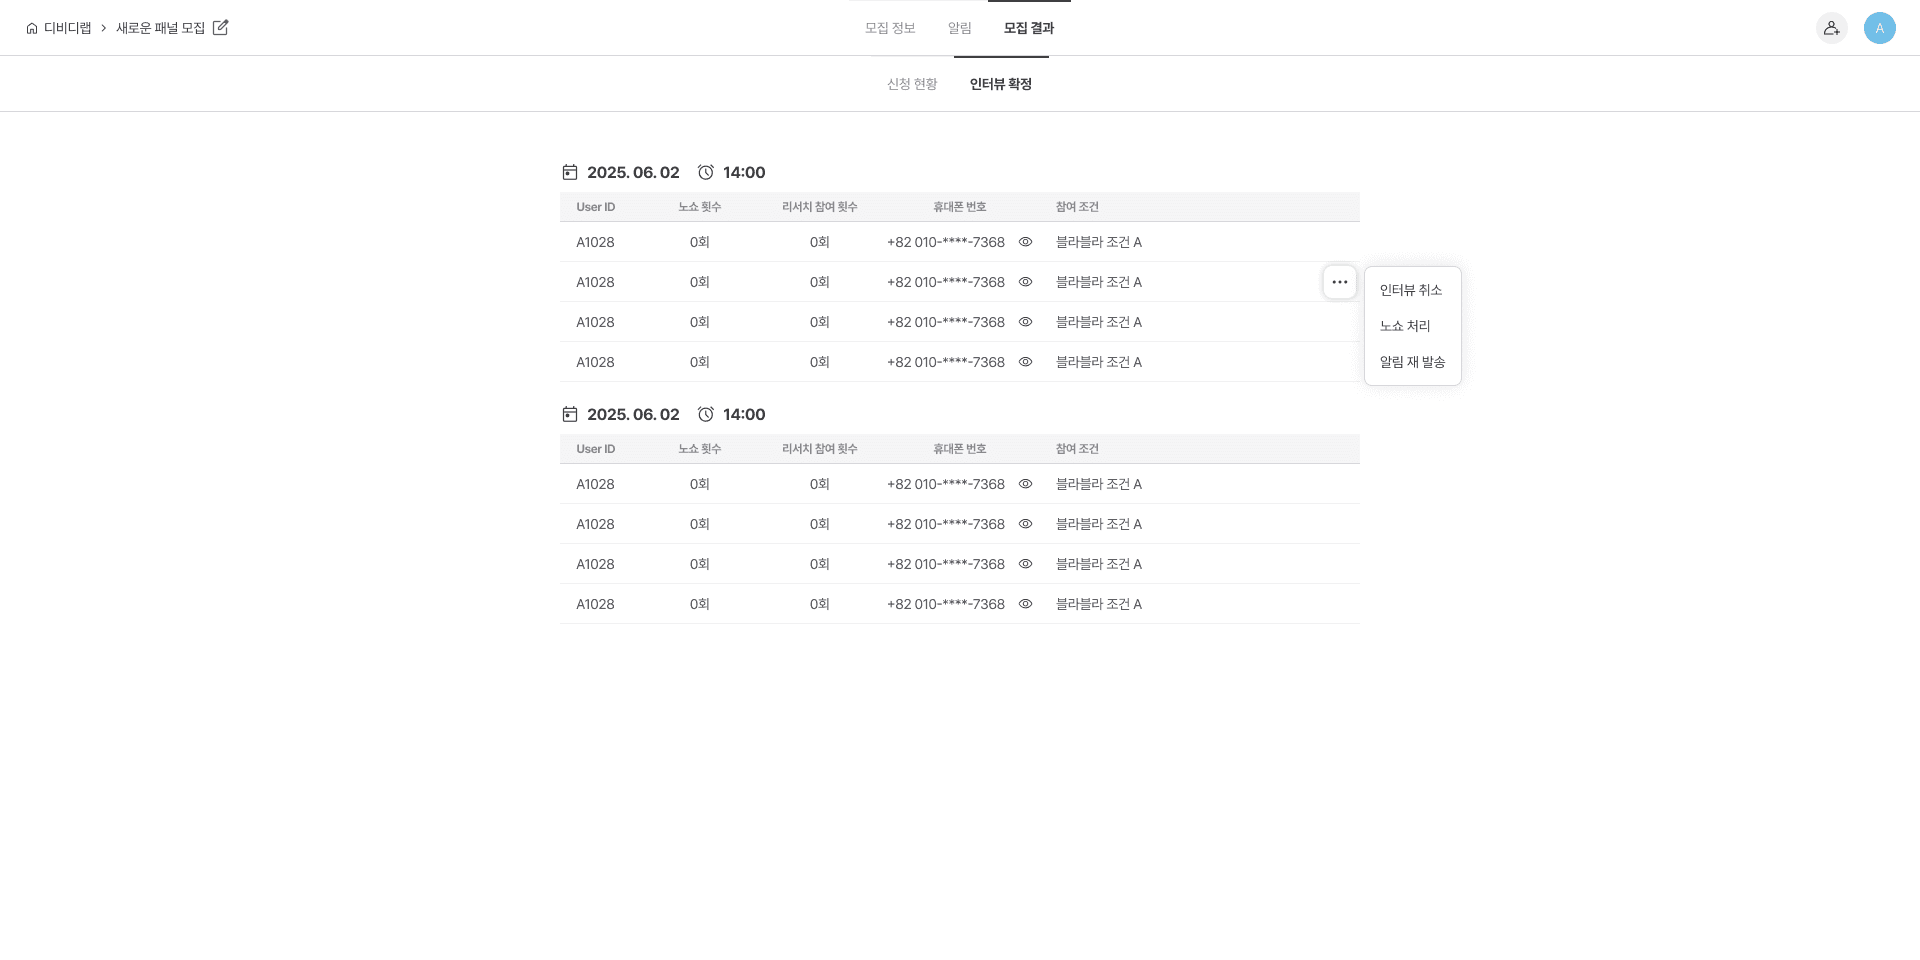
A cancellation notification will be automatically sent to the panel.